1. Installation:
The Web conferencing server package includes:
- TM-200,
TM-500, TS-300, TM-800, TM-1000, TS-700 or TS-900 appliance
(or server)
- Analog console cable
- Ethernet crossover-cable
- Power cord. Power brick (for TM-200, TM-500 and TS-300 only)
- Brackets (for TM-800, TM-1000, TS-700 and TS-900 only)
1.1 Accessing your RHUB Web Conferencing Appliance
There are two ways to access the TM-200, TM-500 and TS-300 appliances: by using plug-and-play or by using an Ethernet crossover-cable. To access the TM-800, TM-1000, TS-700 TS-900 appliances, use plug-and-play. In all cases, an Internet browser needs to be used to access and configure the server.
I. Plug-and-Play
This method requires that you have:
- A DHCP server on your network
- A computer with Microsoft Windows (98, 2000, XP or Vista)
It is important to follow the instructions below to start the server for initial setup:
- Connect the server with an Ethernet cable (not the crossover-cable in the package) to your network
- Plug in the power cord to automatically power on the server
- Wait for the ready light to turn green. This usually takes about 30 seconds.
Open a browser on your computer and type “http://myonlinemeeting”. The following page should appear:
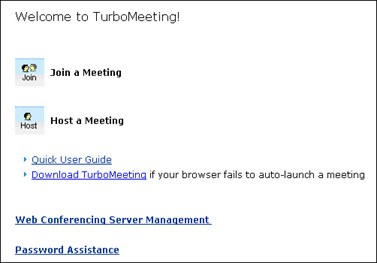
Figure 1.1. Home Page
If the page does not display and you are familiar with your router, check the IP address your router has assigned to the RHUB appliance, which is named “myonlinemeeting”. Then input the IP address in your browser and you can access the RHUB appliance.
If the page does not display and you are not familiar with your router, go to the next initial startup method as detailed below.
II. Local Access
For the TM-800, TM-1000, TS-700 TS-900 appliances only, if you fail to access the appliance by the above method, do the following:
- Plug in your keyboard, mouse and monitor to the appliance
- Power on the appliance
- Wait for 1 minute
- Type “turbomeeting” as the Username and “password” as the Password
- Wait for up to a couple of minutes and you will be connected to the Fedora 4 desktop.
- Open a browser by clicking the browser icon on the top banner
- This will take you to the TurboMeeting web login page (Figure 1.2)
- Follow the sections below to configure the appliance using the browser.
III. Crossover-cable
The crossover-cable is only used for the TM-200, TM-500 and TS-300. Before you use the crossover-cable method, configure your computer (in any operating system) with the following IP setting:
- IP Address: 192.168.1.100
- Subnet Mask: 255.255.255.0
Next, do the following:
- Disconnect your computer from any network including the wireless
- Power on the TM-200, TM-500, or TS-300 (as described above)
- Wait for the ready light to turn green. This usually takes about 90 seconds
- Connect the TM-200, TM-500, or TS-300 to your computer using the included crossover-cable or any Internet cable
- Open a browser on your computer and type http://192.168.1.192. The home page (Figure 1.1) should display.
Once you have accessed the meeting server, you are ready to configure the server. Do not disconnect your computer from the meeting server before you complete the configuration described in the next section. After the configuration, connect the TM-200, TM-500, or TS-300 to your network using a regular Ethernet cable (which is not included).
Note that after you change the system IP settings, the web page will hang. You will need to use the new IP address to access the appliance.
|